Online appointment request provides a convenient and efficient solution for patients who wish to schedule an appointment electronically without having to go through the traditional phone line. It allows patients to quickly request an appointment at any time of the day without having to wait on the line. In addition, it reduces traffic on the clinic's phone line and allows receptionists to become more efficient, while avoiding typing errors and oversights.
This article outlines the steps to follow to process patient appointment requests sent from your website.
Configuration required
Important notes
Steps to follow
⚙️ Configuration required:
The Omnimed appointment requests portal must be added to your institution's website:
- Your institution's administrator account holder must set up the appointment request for your institution.
- They must also obtain a generic appointment request link (URL) or a specific link to a task queue at your institution. You can use an existing task queue or create a new one.
- Ask your webmaster to add this URL to your website in iFrame so that the patient is redirected to the appointment request portal. Omnimed does not update your website.
Important notes
- Test the appointment request portal before adding it to your website to confirm that it meets your needs.
- The appointment request portal does not currently allow filtering of clinic patients. Therefore, anyone accessing your website can send an appointment request. 🚧This is a future development.
- The appointment request does not allow in its current phase the addition of attachments. 🚧 This is a future development.
- It is possible to decline an appointment request from the task and provide a reason for the decline, but no automated communication is sent to the patient upon a decline. You can email or text the patient from the Administrative Center. 🚧 This is a future development.
- You must assign an appointment or refuse the request from the task in order to change its status. The action of only completing the task linked to the request will not close the request. It will remain pending, but will no longer be visible in uncompleted tasks.
Steps to follow
From the Tasks module:
- Select the view The tasks linked to an appointment request and then the Administrative tasks queue or another task queue configured for the appointment request for your institution.

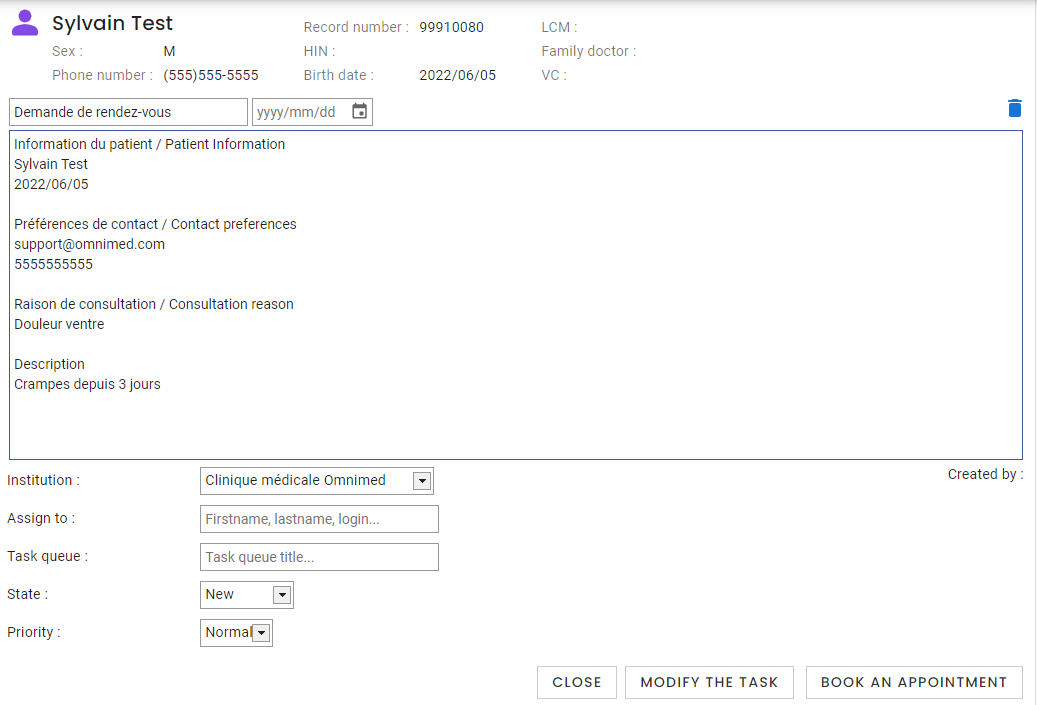
- Click on the task title to open it.
- Validate if the patient is already associated to the task. If this is not the case, you will have to associate the patient manually when booking the appointment.
If the information provided by the patient at the time of the appointment request is the same as the information in his record, the task will be automatically associated with his patient record. The rules for association are 1) HIN and date of birth or 2) first name, last name, gender and date of birth combined with email or phone number. - Review the content of the request found in the task Description field. Here you will find the patient's identification, contact information, reason for consultation and a description.

- If a file was attached to the appointment request, it appears on the right. You can click on the file to view it in another tab.

By assigning an appointment from the task, the file will be transmitted to the patient's file for import.
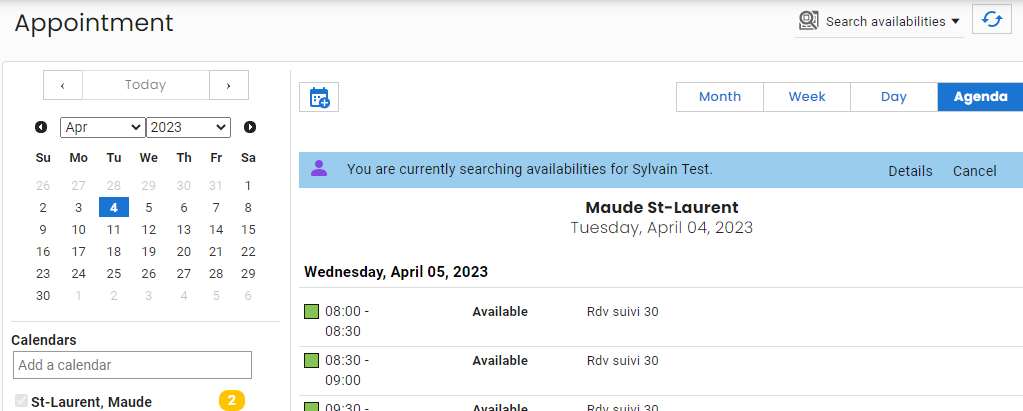
- Click on the Book an appointment button at the bottom of the task to open the appointment module in Search availabilities mode for the patient associated with the task.

If applicable, click on the Decline request button to decline the request. A comment must be added to the task to explain the reason for the decline. ⚠️Please notify the patient of the decline by calling him or using communications through the administrative center (SMS or email) as no automated communication is sent to the patient at this time. - Choose the calendar into which you want to book the appointment.
- Propose or book an appointment according to the usual steps. The information contained in the task is automatically added to the Consultation reason and Description fields in the Plan an appointment window.
- Once the appointment is assigned :
- The patient receives a booking notice via email or SMS if automated communications are active.
- The appointment request task is automatically updated to the status Completed with the addition of a comment indicating that the appointment has been assigned. Note that the task list must be updated manually by clicking on the "Refresh" button located in the page header.
Notes
- The tasks linked to an appointment request, being administrative in nature, do not appear in the summary box Tasks of the patient record.
- These tasks are not counted in the Tasks indicator.
Related articles
- View the patient's appointments
- Assigning appointments
- Propose an appointment by email or SMS
- Confirm the patient's appointment by email or SMS